Editing Custom Reporting Settings
Enabling the Custom Reporting feature in QMS requires a Custom Reporting license. When properly licensed, a header appears on the General configuration tab in QMS - Custom Reporting Settings.
Or with a multi tenant license, on the Provider tenant, on the Tenants page, while editing an existing tenant, on the configuration tab in QMS - Custom Reporting Settings.
Initial Configuration

The heading indicates if the feature is enabled, and if not allows an administrator through the process of enabling the Custom Reporting feature.
The set-up process is as follows:
-
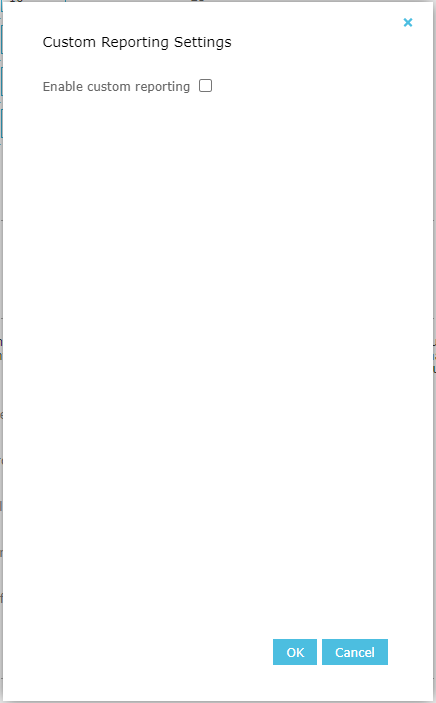
Click on the Configure icon.
-
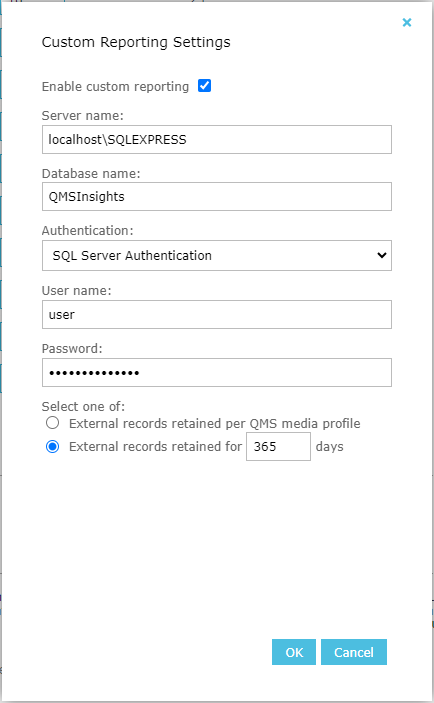
Check the Enable custom reporting checkbox to enable the feature.
-
Enter the Server name in the textbox. For example: localhost\SQLEXPRESS
-
Enter the Database name in the textbox. Or leave it as default QMSInsights.
Allows only letters, numbers and underscores.
Minimum length 4, maximum length 26.
-
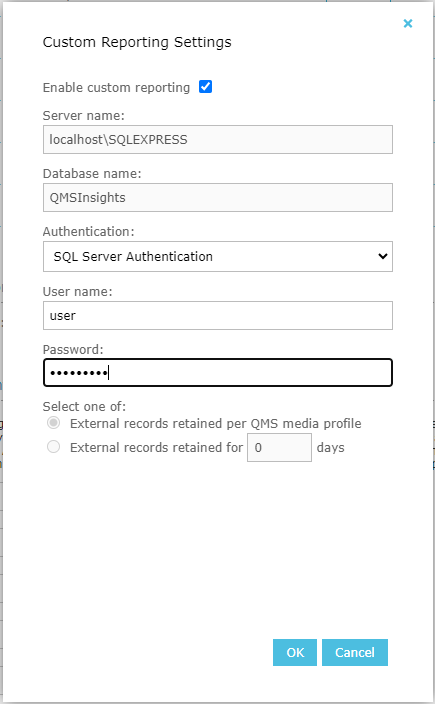
Select the Authentication type: Windows Authentication or SQL Server Authentication.
- If selecting SQL Server Authentication enter the User name and Password.
User name maximum length 20.
Password maximum length 50.
- If selecting SQL Server Authentication enter the User name and Password.
-
Select the external records retention type: per QMS media profile or for days.
- If selecting for days enter the number of days in the textbox.
-
Click the OK button to save.
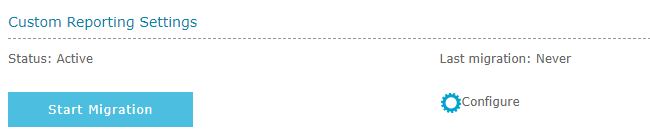
If saved with success, the form closes, the status shows as active, last migration label appears, and a Start Migration button also appears.
Clicking on the button, will start the initial migration.

If the initial migration started with success, you will see it displayed with a green check.
Please note that the initial migration can take hours to complete on a large database.

The initial migration is complete when you refresh the page and see the last migration date displayed.
The last migration date will also be updated when a maintenance migration ends. Maintenance migrations run every 15 minutes.
Updating Authentication
The update authentication type or credentials, the process is as follows:
-
Click on the Configure icon.
-
Select the Authentication type: Windows Authentication or SQL Server Authentication.
- If selecting SQL Server Authentication enter the User name and Password.
User name maximum length 20.
Password maximum length 50.
- If selecting SQL Server Authentication enter the User name and Password.
-
Click the OK button to save.
Disabling Custom Reporting
The disable process is as follows:
-
Click on the Configure icon.
-
Uncheck the Enable custom reporting checkbox to disable the feature.
-
Click the OK button to save.
After disabling Custom Reporting, it will show as inactive. It will alow a new configuration with different settings.
Please note that QMSInsights database is not deleted when disabling Custom Reporting, but will be cleaned if enabled with the same configuration of server name and database name.
Encountering a previously abandoned QMSInsights database
When enabling Custom Reporting with the same configuration of server name and database name you used in the past, a confirmation is needed. This is because QMSInsights database is not deleted when disabling Custom Reporting, but will be cleaned when re-enabled.
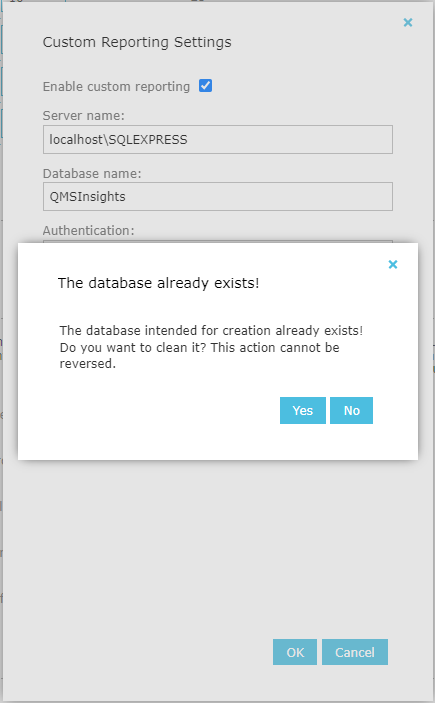
Choose one of the following options:
-
Click the Yes button to clean the database. Please note that this action cannot be reversed.
-
Click the No button, and enter another database name or server name.
-
Click the No and then Cancel buttons, if you no longer want to enable it.
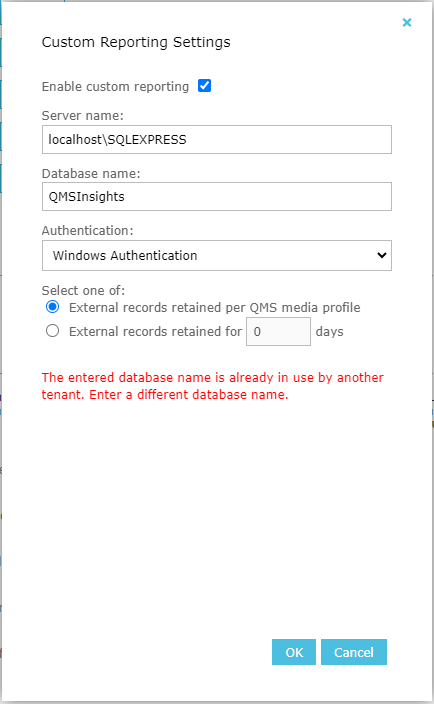
QMSInsights database in use by another tenant
With a multi tenant license, the database may already be in use by another tenant, and you will get an error message if you try to use it. Choose another database name or server name.
See Also: