Avaya AES Integration with Port Mirroring
QMS CallRecording records and monitors telephone calls by sniffing
packets traversing across the data network. Packet sniffing is achieved by
enabling port mirroring on a data switch and feeding the mirrored port of that
switch to the sniffing port on the QMS Server. Port Mirroring is supported
by most data switches and when enabled will send a copy of every packet destined
for one port to another port. For more information on
port mirroring, click here.
Please note that DHCP and Extension mobility are supported in QMS Version 5.1.0 + with Avaya AES 5.2 +.
QMS Call Recording Setup & Configuration
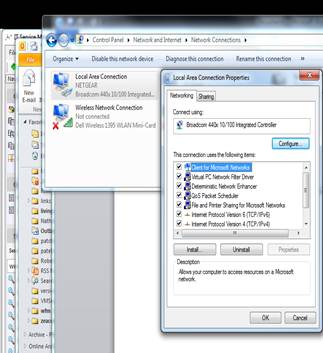
Working in an Avaya port mirroring environment, the Call Recording Server must have 2 NIC's. The primary NIC for a LAN connection must have a static IP address. The second NIC used as the sniffing port, must have the tcp/ip properties unchecked in the NIC properties.
Verify the NIC properties by going to Control Panel > Network & Internet > Network Sharing Center > Change Adapter Settings.
The illustration below shows the Properties page. For the LAN NIC, uncheck Internet Protocol Version 6. For the Sniffer NIC, uncheck both Internet Protocol Version 6 and Version 4.
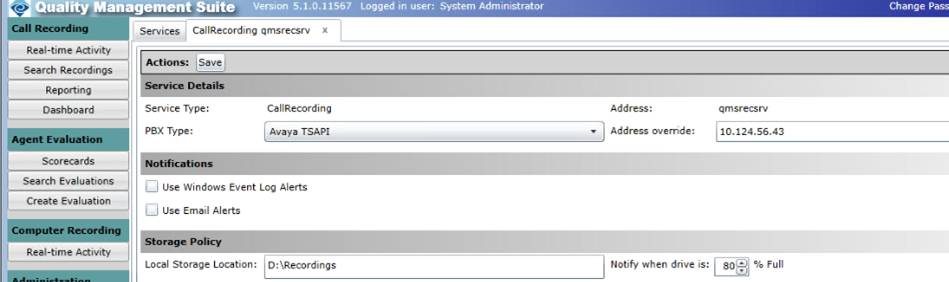
The only other Avaya AES specific thing that you need to do is to set the PBX type in the QMS Server Services setup. Login to the QMS Server and click on the Services button on the left menu. The Services page will open. Highlight the service and click edit. This will give you the option to select the correct PBX type. Select Avaya Tsapi. Make sure that you save the changes.
Installation of Avaya Tsapi
1 . Makes sure the requirements of the Avaya are met. You must have an AES license for each and every users to be recorded.
2. You must install the Avaya AES Tsapi client on the QMS Call Recording server. The Avaya AES Tsapi Client is on the Avaya AES Install disk.
3. Make sure that the AES Tsapi Client is the exact same version as the Avaya AES Server.
4. Run the Tsapi client installer. The installer will ask for the Avaya AES Server name. It will typically look like Avaya#SWLINK#CSTA#MYPBX
5. You also need an Avaya Username and Password that should be created by the customer.
6. Now test the Tsapi connection by running the Avaya Tsapi Test tool that comes with the Tsapi Client Installer. It is located in Program Files X86 / Avaya / AES / AEServices / TsapiClient / Program folder (See below)
Click and Run TSTEST32
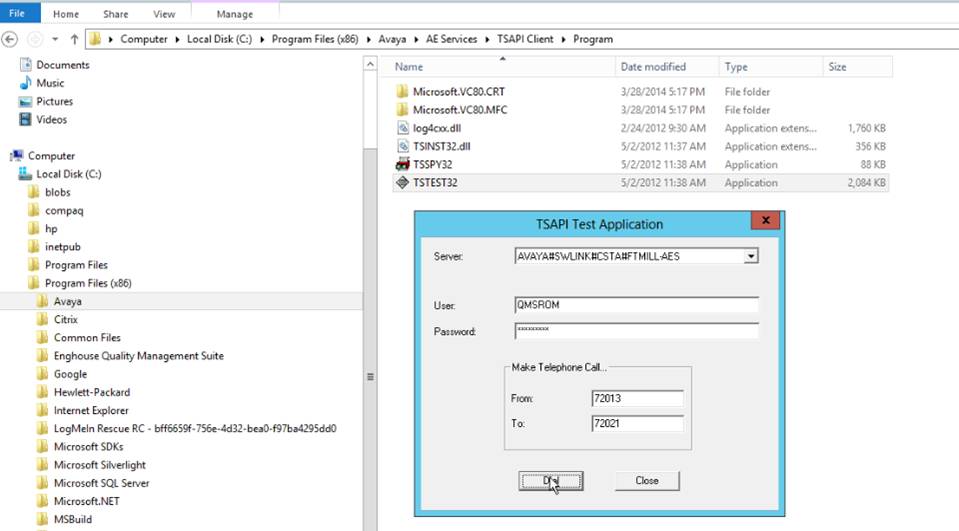
7. Enter the Server name, Avaya User Name, Avaya User Password. It is also neccessary to enter 2 extensions for a test call.
8. Execute the test and confirm that it was successful.
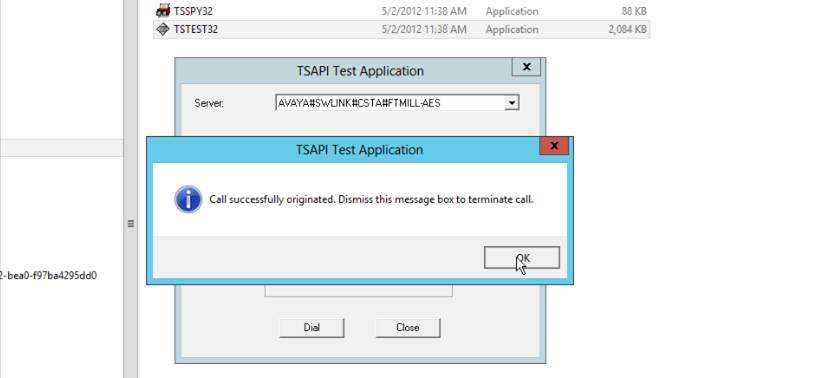
9. This test must be successful before proceeding.
10. You need to add 3 keys to the Tsapi section of the CallRecordingService.exe.config file.
1. TSAPIServer - AES Server string from TSAPI Spy Application, as shown in the Test Tool
example: AVAYA#CMSIM#CSTA#AESSIM
2. TSAPIUser ( AES Username with admin rights)
3. TSAPIPassword (AES Password for User)
It Should look like this (example only)
<Tsapi TSAPIUser="QMSRecorder" TSAPIServer="AVAYA#CMSIM#CSTA#AESSIM" TSAPIPassword="UserPassword" />
11. PLEASE read this section CAREFULLY: There are 2 setups that we encountered with AES integration.
11.1 If the hardphones do NOT have an assigned extension (no dial tone) and a User must login to the phone to use it, then you do not need to use the keys in 11.2 Below.
11.2 If the hard phone have a default extension and dialtone, and a User must login to the phone to use their own assigned extension, then you need to add the following keys to the Tsapi area in the CallRecordingService.exe.config file
EnableAgentBasedProcessing="true" EnableTsapiPrivateData="true"
12. Encryption needs to be turned off at the phone/pbx level for QMS to record calls.
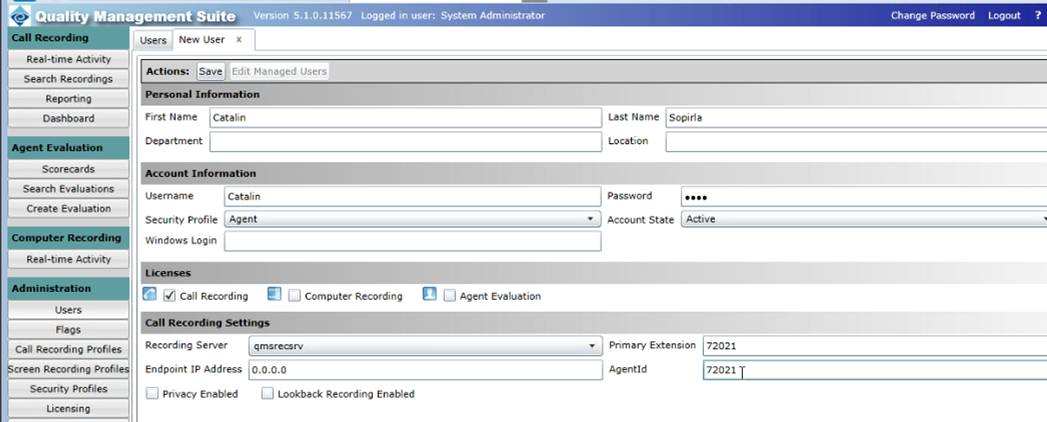
13. QMS User Setup - The primary extension as it appears in Avaya is required.
The AgentID is also required. Typically in AES, the extension and agent ID are the same.
You can leave the End Point IP address to default 0.0.0.0 as we will pick it up automatically.
14.
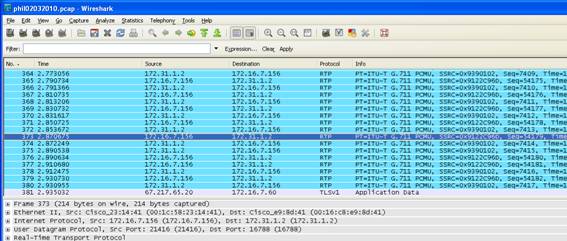
Packet Capturing:
Avaya
Voice traffic will appear as UDP packets. When decoded as RTP packets, you will
be able to see the Codec and Audio Compression Protocol ex: G711 or G729 Codecs.
How to Capture:
1. Open Wireshark
2. On the TOP menu, Click Capture > Interfaces
3. Click on the Start button next to the Sniffer Interface
4. Place the test call, talk for 15 seconds and then hangup
5. Click Capture > Stop
6. In the Filter field atop WireShark enter ip.addr==192.168.12.100
and hit enter
(Note the 2 = signs) (Note: input the actual IP address of the test
extension)
7. Depending on the size of the capture, it may take several minutes to filter
through and
provide you with the capture you are looking for.
8. Insure that the proper Codec is being used to encapsulate the voice traffic.
On Wireshark, right click on one of the UDP packets.
Select Decode As from the drop down menu. Scroll down to RTP and click OK. It
may take a few minutes to re-filter through.
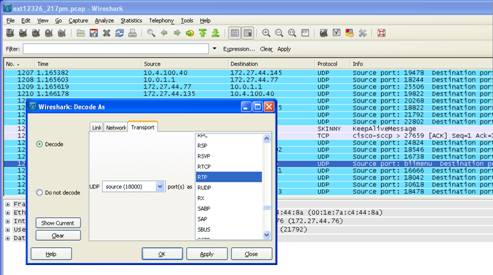
The end result will be to re-filter the UDP packets into RTP packets which will clearly show the Codec. In this case the Codec displayed is G711.